My first project with Maya was very enlightening and fun. At
first I had a lot of problems because I wasn’t too familiar with the basic
tools. This was my first time with Maya so I made a lot of mistakes, and ended
up starting over again a few times. After my final attempt on the Hammer
though, I feel somewhat comfortable with the controls, and I’m excited to see
what I can accomplish on my next project (A dagger) with what I’ve learned.
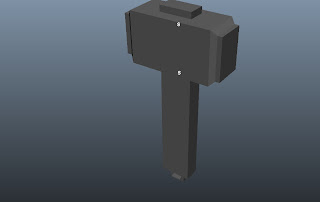
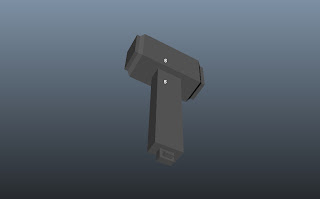 My First attempt hit a lot of snags. I couldn’t remember many
of the tools, but after poking around each of the menus, and remembering to
switch my toolset over to the polygon set; I found most of what I needed. I
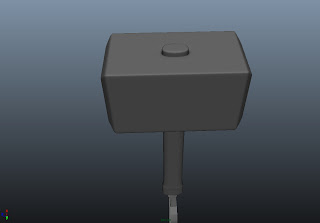
began the first hammer with just a simple cube. It took me a few times to get
the cube just the size I wanted, so I began using the scale tool to changed its
shape to somewhat fit the size of my reference images. Once satisfied with the result,
I went onto using the edge loop tool in order to start dividing my cube in manageable
surfaces. I wasn’t familiar with the interactive splitting tool yet so I couldn’t
figure out how to make any round surfaces to be later extruded out from the
main cube. So I ended up just pulling out a square shaped nub from the top and
a very blocky handle at the bottom; by right clicking, selecting Faces, and
then highlight the faces I wanted to use the extrude tool on. I shaped a
smaller strap holder onto the bottom of the handle. I also attempt to make the
strap, but only got as far as, making the shape for the strap and making the cv
curve line.
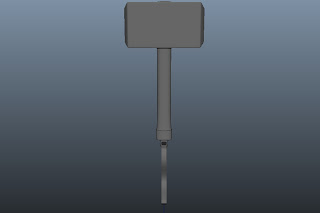
My second attempt was in the middle of class. I did get much
farther on this one, and I learned a whole lot more about the smoothing, edge
loops, and interactive splitting. I hit a couple of snags when it came to
merging, but I figured I could work around that later on my 3rd
attempt. I learned how to line up seams from my mishaps though.
 |
| Front |
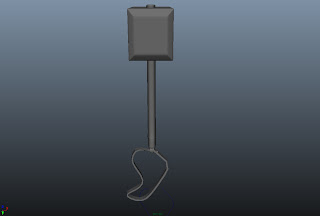 I began my third hammer attempt with a simple cube, like I
had done in the first attempt. Now that I had more knowledge about the edge
loop tool and the smooth hot key, I had a better idea of where and how to place
my grid lines in order to get maximum sharpness but less polygons. I tried
using the “multiple lines” option in the edge loop menu, but I didn’t like how
much it divided it up so I did most of it by hand. I then began cutting out the
top notch of my hammer with the interactive split tool. This time I was able to
form a circle, but the grid line went a little wonky, but I added “supports”
around it to maintain shape. Once done with that, I began to individually
select the lines and tweak them even further to get a better circle. Then I
used the extrude tool and pulled the middle out. I later went back and added
two more edge loops, and took the loop nearest the hammer and pulled that seam
into the hammer to make it look like the notch was going through and coming out
the top of the block. I used a similar technique when I was forming the handle.
I cut out a circle and then extruded the inner edge out and took the outer edge
and pulled it into the hammer to give it the same effect as the top notch. I
added a few more edge loop to the top, middle and bottom sections of the
handle. I then selected the very bottom of the hammer and scaled it out
somewhat, creating a small pommel at the bottom. I then took the top edge of
the pommel and extruded it outward, making the pommel look more like a metal
cover in my opinion. I then began
working on the strap holder; I split the faces on the bottom of the pommel up
into smaller pieces, and then extruded the portion. Then I added more loops to
it make the holder straighter, and less round. I then cut out the middle which
made the side warp out. I wasn’t sure how to fix this. But I really like the
effect it had on the holder ring.
I began my third hammer attempt with a simple cube, like I
had done in the first attempt. Now that I had more knowledge about the edge
loop tool and the smooth hot key, I had a better idea of where and how to place
my grid lines in order to get maximum sharpness but less polygons. I tried
using the “multiple lines” option in the edge loop menu, but I didn’t like how
much it divided it up so I did most of it by hand. I then began cutting out the
top notch of my hammer with the interactive split tool. This time I was able to
form a circle, but the grid line went a little wonky, but I added “supports”
around it to maintain shape. Once done with that, I began to individually
select the lines and tweak them even further to get a better circle. Then I
used the extrude tool and pulled the middle out. I later went back and added
two more edge loops, and took the loop nearest the hammer and pulled that seam
into the hammer to make it look like the notch was going through and coming out
the top of the block. I used a similar technique when I was forming the handle.
I cut out a circle and then extruded the inner edge out and took the outer edge
and pulled it into the hammer to give it the same effect as the top notch. I
added a few more edge loop to the top, middle and bottom sections of the
handle. I then selected the very bottom of the hammer and scaled it out
somewhat, creating a small pommel at the bottom. I then took the top edge of
the pommel and extruded it outward, making the pommel look more like a metal
cover in my opinion. I then began
working on the strap holder; I split the faces on the bottom of the pommel up
into smaller pieces, and then extruded the portion. Then I added more loops to
it make the holder straighter, and less round. I then cut out the middle which
made the side warp out. I wasn’t sure how to fix this. But I really like the
effect it had on the holder ring.Finally I made the strap; first I made a small flat cube, and then made a strap path with the cv curve tool. I lined up both pieces with the holder and then selected one face on the side of the cube and the cv line, and clicked extrude, I then added more segments until the strap was smooth looking. I then selected one face on one side of the strap and the other face on the other side of the strap, and bridge them together with the bridge tool.


No comments:
Post a Comment